Fluent Forms is a popular WordPress plugin that allows you to make forms easily. One thing I didn’t like is that there is no onFocus options for animations etc. With inspiration from a different post about hyper link hover animations ( found here ) for Divi menu modules, I added on focus animation for my Fluent Form. I created this small tutorial to show how I did it.
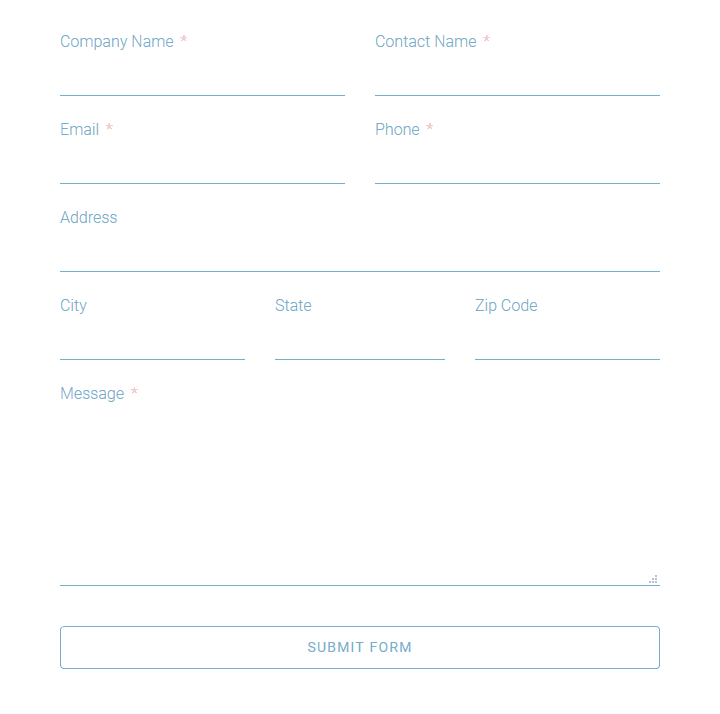
Here is an example of what the outcome looks like:
To do this, you first have to add the class “animated_form_element” under the Advanced Options for each of the text/textarea’ “Element Class” field such as below:

Next, we need to add some custom css and javascript to our form. We add it by going to the form’s “Settings & Integrations tab -> Custom CSS/JS” section.
For the CSS, it really depends on the look you are going for but for this example I wanted a bottom border to be shown on the input/textarea field regardless if it has focus or not. I also removed the default border radius on the input field as well. Here is the customer css to accomplish those things.
|
|
.fluentform .ff-el-form-control{ border-top:0px!important; border-left:0px!important; border-right:0px!important; border-bottom:rgb(116, 175, 205) solid 1px!important; border-radius:0px!important; } |
I use !important to be sure it overrides Fluent Forms default styles.
Next, let’s add the styles needed for the actual animation itself as well as modifying how the “This field is required.” is shown:
1 2 3 4 5 6 7 8 9 10 11 12 13 14 15 16 17 18 19 20 21 22 23 24 25 26 27 28 29 30 31 32 33 34 35 |
.animatedStyleName { position: relative; overflow: hidden; transition: all 0.3s; -webkit-transition: all 0.3s; -moz-transition: all 0.3s; -o-transition: all 0.3s; } .animatedStyleName::before { content: ""; position: absolute; z-index: 2; left: 0; right: 100%; bottom: 0; background: rgb(116, 175, 205); height: 2px; -webkit-transition: all 0.3s ease-out; -moz-transition: all 0.3s ease-out; -o-transition: all 0.3s ease-out; } .activate::before { right: 0; } .fluentform .ff-el-form-control { border-radius: 0px!important; } .fluentform .ff-el-is-error .text-danger { position: absolute; bottom: 5px; } |
The error message for “This field is required” aka .text-danger is made switched to absolute positioning and in this case has been set 5px from the bottom of the input fields container. Really, this could be different based on how you want the field to show on the form. You could use top instead for example. However, the .text-danger must be made absolute as we need it out of the document flow so it won’t create visual bugs with extra space in between the inputs border bottom and the border bottom that is used to create the animation.
Finally, we need to add some custom javascript to the form as well:
1 2 3 4 5 6 7 8 9 10 11 12 13 14 15 16 17 18 19 20 21 22 |
jQuery(".animated_form_element").parent().addClass("animatedStyleName"); jQuery(".animated_form_element").each(function () { if (jQuery(this).val()) { jQuery(this).parent().addClass("activate"); } }); jQuery(".animated_form_element").focus(function () { jQuery(this).parent().addClass("activate"); jQuery(this).next('.text-danger').css("display", "none"); }); jQuery(".animated_form_element").blur(function () { if (!jQuery(this).val()) { jQuery(this).parent().removeClass("activate"); } }); jQuery(".ff-el-input--content").click(function () { jQuery(this).children('.text-danger').css("display", "none"); jQuery(this).children('.animated_form_element').focus(); }); |
And that’s it for this example really.
You may notice I named the actual animation class name “animatedStyleName” which is generic. I did this because really you could take many of the different animations listed in the divi-menu-effects.css you can download from this site and replace the rules of animatedStyleName to do different types of animations. You have to subscribe to his newsletter in order to get the previously mentioned .css file that has the different animations. Some of the animation examples on that site require more work than what I described but I plan on writing an extension of this tutorial if it seems people might want it.
Can download the Fluent Form export example here . You may have to right click -> “save link as” for it to work.
Live example: